Monday, April 26, 2010

Sometimes I dont know why I bother...

this time I'm moving to tumblr...

it's more idiot-proof than wordpress! and I'm an idiot.

New addy is: ecrubike.tumblr.com

last move evah........ maybe

Thursday, April 22, 2010

Tuesday, July 28, 2009

Mapping the Route

I've started to map the route. I did this in a few stages, firstly looking at spots where family are, secondly looking at spots where awesome things are (UNESCO world heritage sites for example), and thirdly by looking at flickr and looking at other awesome looking places.

Then I tried to see how whatroute could take me through all these awesome places without doubling the distance. Here is a link to my effort so far (it is incomplete as of posting). It has so many markers that you have to click across at the bottom to actually see all the points (and the route). So far it goes from Rome to about Besancon in South East France.

You may also note that it goes over about twice as many Alps as is really necessary... this is entirely because I want to go to Chur, to see this awesome railway:


Big thanks also to Andrew Sykes whose research and planning formed the basis of my route!

Wednesday, July 8, 2009

Exustar Stelvio Shoes Review

First Impressions

The first thing that struck me about these shoes was the build quality. They are solid shoes, thick, rigid leather, quality stitching and a very inflexible and thick sole (I think it has a metal plate in it). This is all good (at least for riding).

On the Bike:

The rigid sole is great for riding. I tend to ride pretty hard, I get out of the saddle a lot and trash the pedals – these shoes stood up to the punishment admirably. It is, however, important to make sure that you lace them up well (tightly). Furthermore, it is very important to tuck the drive-side laces into the shoe to ensure they do not get caught in the mechanisms! I am strongly considering cutting the laces shorter, they are quite long and are a hazard near the front cogs.

I have worn these in wet weather and they are surprisingly water resistant. I have not tried them in incredibly hot weather.

Off the Bike:

These are most certainly not walking or running shoes, they are cycling shoes that ‘can’ be walked in. The rigid sole is not great on un-ever surfaces, and I would hate to think about walking in these on slippery rock surfaces. Having said that, these are in a totally different league to my sidi’s (with the giant cleats out the bottom) which are practically un-walkable over distances exceeding 100m.

The cleats I have used (Time ATAC) sit within the sole, however, they do occasionally knock the floor when walking. I would not recommend running around polished wooden floors with these on!

Fit:

I bought these online without trying a pair on first (thanks to there being NO distribution in Australia). I have numerous pairs of shoes, ranging from 43 to 44.

My Sidi shoes are 43 and fit perfectly (if a bit touchy on the width). I have fairly broad, short feet too. I decided to play it safe and get 44’s and I’m glad I did. The fit on these shoes is not very accommodating for broad feet. The width is perfect for me in the 44 but I have a spare 1-2cm of space in the toes (not ideal). These shoes are also quite tall, though correct lacing should fix this – if not – an inner sole!

I expect the leather to soften a bit with wear, and the fit could improve with time. I will update this post after 6months or so to see how they go.

Recommended use:

These shoes look normal, that is their key benefit. They are competent riding shoes with good walkability off the bike (for cycling shoes) but their real bonus is that they remove the need for a second pair of shoes. You could easily wear these shoes to the pub, to a mates place, social occasion or casual workplace and no one will notice.

If you are after a pair of cycling shoes just for cycling, there are better and cheaper options out there. If, however, you want a pair of incognito cycling shoes that don’t ‘clipety clop’ but give you the advantages of cleats, rigid soles and tight fit these are your shoes!

Tuesday, June 16, 2009

My Surly Long Haul Trucker - Nearly finished


I put on the handlebar tape today, and it's looking mighty fine in my very biased opinion!

Monday, June 15, 2009

How To Remove Brake Levers

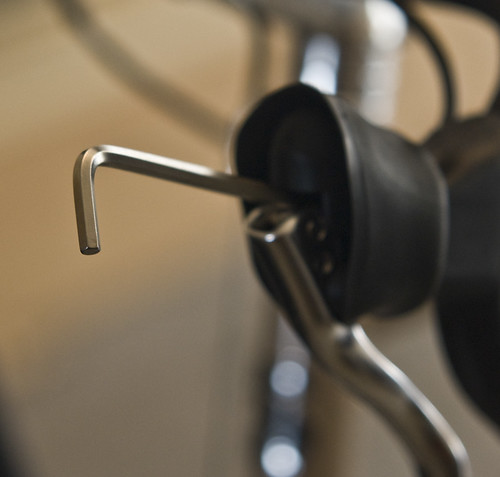
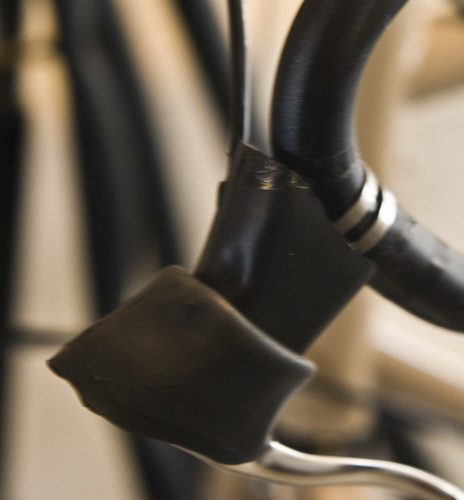
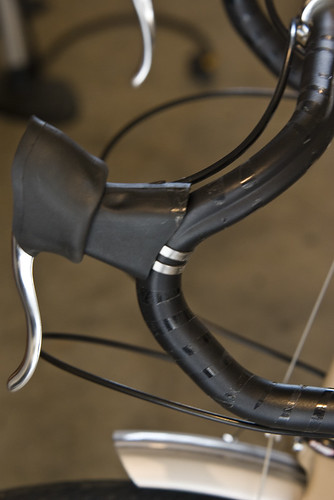
As with the bar end shifters below, I found this a little fiddly and would have loved some photos before doing it! If you are going to do this, I recommend having an array of Allen keys (long and short) as the space in which you have to turn the bolt is small, and the bolt can be quite tight!

Step 1: Un-clip the Brakes


Step 2: Pull down Brake Lever, Insert Allen Key, Turn anti-clockwise to loosen


Another view:


Step 3: Once loose enough, move brake levers around and off the end of the bar.


This was also quite easy, but a little fiddly loosening the Allen key bolt inside the brake lever. You can actually remove the whole lever from the bracket if you unscrew totally, but it is probably just as easy to loosen it enough, and it should slide around the bar (I had to loosen it a lot more than I anticipated as the bar is a bit thicker at the ends and round the bends).

Hope this helps!

How To: Remove Bar End Shifters

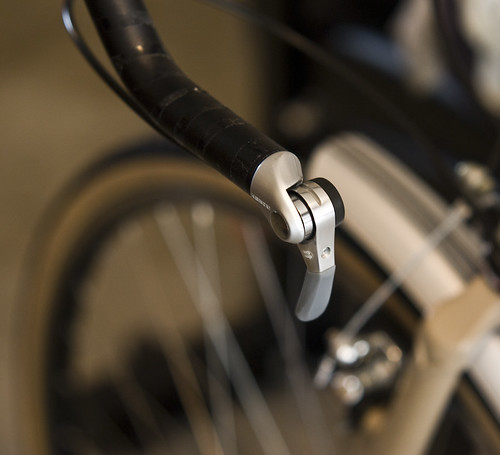
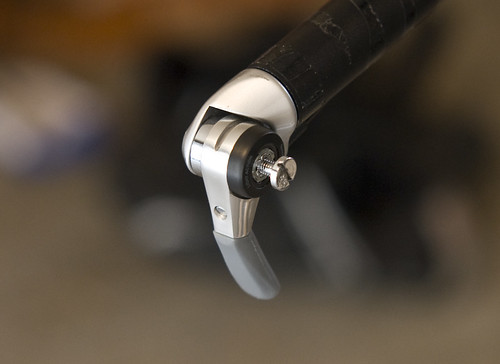
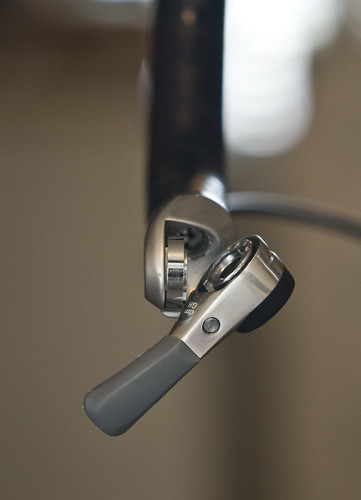
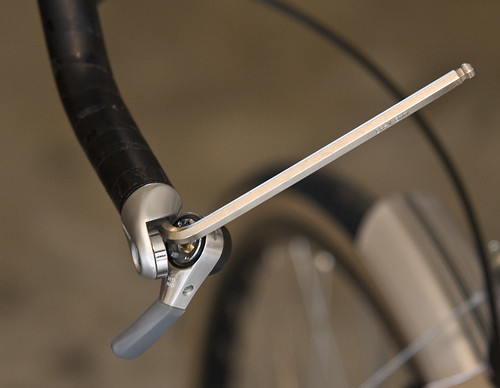
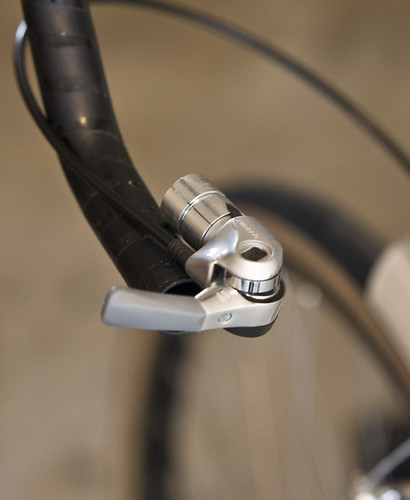
So I wanted to change over the handlebars from the stock Surly LHT ones to the Nitto Noodle bars - having never done this before I went searching on the internet. I found the advice of Michael Gagnon on the Surly Google forum very helpful but really wanted some pictures to go with it.

I didn't find any, but I have taken some pictures of my successful removal and replacing of the bar end shifters - to help anyone else out there like me who loves photos.

Step 1: Remove Bar Tape


Step 2
: Move Both Shifters to the Downward position


Step 3: Undo the Screw on the Shifter


Step 4: Remove the Shift Lever


Step 5: Loosen the Expanding Allen Bolt Inside the Bar (TURN CLOCK-WISE TO LOOSEN!!)


Step 6: Pull out the whole Mechanism


So... it's really quite easy and understandable that no one has bothered putting up step-by-step photos before!

Sunday, June 14, 2009

Icebreaker Merino Clothing

Anyone who has bothered to look at my list of camping gear might have noticed the huge amounts of 'Icebreaker 100% Merino' clothing that I plan to buy. I cannot recommend their gear enough.

Icebreaker gear is great for a number of reasons.
1) they look great*,
2) you can wear them cycling/camping for multiple days without washing them** and they just smell like wool,
3) the 150 weight is very breatheable and could comfortably be worn on Australian summer days,
4) the merino wool wicks your sweat away so they never become saturated, even if you are wearing a backpack and cycling hard up mountains,
5) you are directed to wash them in cold water with a small amount of soap! (great if that's all you have)
6) it is merino wool, and doesnt give you the brutal 'wool itch' - though for people who are ultra sensitive they may want to try one on at a camping store first. I hate the wool itch, and while these feel like wool when you first put them on I dont notice it after about 2mins.
7) they are sustainably made, carbon neutral, 100% natural, etc. You can even plug in the 'baa code' and check which sheep 'donated' the wool!

I bought my first icebreaker shirt about 3 weeks ago and have barely taken it off while riding. I have even warn it out, as it is nice and warm, and will definitely be replacing many shirts in my wardrobe with these.

UPDATE: I've just re-read this and I feel the need to disclose that I dont actually work for Icebreaker or know anyone that does! I'm also not the only one that loves these shirts, google them or check out these more thorough reviews.

The cheapest place I have found to purchase them is 'mi woolies'. I have been told by Iomandra on the Surly Google forum that Bivouac have discount icebreaker store - not all sizes/styles are discounted, but I'm sure I'll grab a few bargains if I keep my eyes open - thanks for the tip!

* I read an article in the Australian where a guy documented his round the world business trip on just carry-on luggage, he raved about these shirts and said they often got mistaken for Armani. The article is very wanky but interesting to read.

** At the risk of repulsing people, I have actually done this... I dont think they smelt bad, honestly.

Thursday, June 11, 2009

Worried about bicycle fit?

When buying odd bikes like surly LHT's over the internet it is always a bit daunting thinking about what size to get.

Here are two valuable resources:

Bike fit calculator.

A Table from the Google Surly group of the size of LHT users got and whether it fits! (what a great idea!)

Wednesday, June 10, 2009

My Current Surly Build

My build can be seen here on google documents. I think I will also put up some costings when I can be bothered as Andrew has on his fantastic blog here.

I got the Surly

Well after much over analysis, at one point even considering a Kona Sutra, I bought the LHT (54cm). I live in Brisbane and there is only one shop that actually stocks the LHT (Epic Cycles, great shop with nice people) and they didnt have my size. I ended up purchasing the bike from brunswick street cycles in Melbourne. They stocked it for $1999 and shipped it for free in 4 days! Needless to say I was very happy with their service.

Another option I considered was to purchase the LHT from wiggle (around AU$1550), but I did more calculations and realised that with the $170 postage, GST and customs duty I would have to pay the dollar difference amounted to about $50.

I will post some photos up once I get my upgrades on (and my camera back from my sister). I have already added the SKS Chromoplastic fenders (P55), I intend changing the drop bars (I don't like the curve) and adding a Brooks B17 saddle. I also am getting a Tubus Cargo rack.

I have also got Time ATAC LOC pedals.

All in all I love the look of the bike, it is noticeably heavier than my roady (duhh) but feels solid and not overly 'truck' like. The granny gears are crazy, but I assume will come in handy when I belt up the alps hauling 70kg of gear!

Front Light


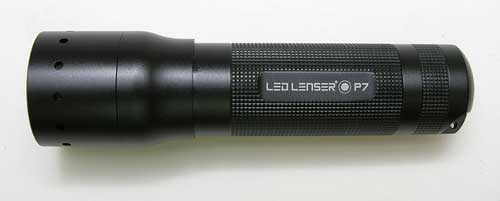
I think I'm going to go a flashlight for my front light. Just read this review of the Lenser LED P7. It sounds like an awesome flashlight, though a tad expensive!

It has 130 hours of battery life and 4.45 wats with 167 lumens! That's pretty insane. Going for ebay for about $100.00, when compared to a decent bike light that is very reasonable.

UPDATE: Ebay is actually more expensive than bike lights which sells them for $98. Additionally, they seem to work well in a combo with the Two-Fish cyclo-block velcro attach system which is available for about $13.

These two-fish cyclo-block thingys look kinda handy for strapping things to your bike, anything from torches, u-locks to pumps etc.

Tuesday, June 9, 2009

Touring Shoes


Ideally I want shoes that I can wear on and off the bike. I have gone for Time ATAC cleats/pedals for this reason (they are small and low profile, no clipety clop!). At the moment I am thinking the Exustar Stelvio SPD commuter/touring shoe. They are leather, look like fairly normal (click the pic for a full view) and are walkable!

If possible I don't want to have to bring a spare pair of shoes... so these would have to get me into restaurants and wherever else I want to go. They also need to be stiff for long rides... a bit much to ask for just a pair of shoes?

Monday, May 11, 2009

Sleeping Bag

I think I've found the perfect sleeping bag! 640 grams!

It fits the temperature range nicely and is rated to an extreme of -4 degrees...but I would be hoping not to be anywhere that cold.

The Vango Venom 150:

Specification:
Suggested Usage: +7 to +25oC
Performance: 2 season
Maximum User Height: 185 cm
Dimensions: Length 210/ Chest Width 75/ Foot Width 50 cm
Total Weight: 640g (Excl sac 575g)
Fill Weight: 1x90 top/ 1x60 base g/m2
Pack Size: 20x12 cm
Zip: Left-hand


Prices:
ebay has them on buy it now for about $169 + $10PH
UK shops have them for about 50-65 pounds which would be cheaper but postage tends to be hefty...

Jackson online (a UK store) have it for about 160 including postage.

Outdoor Action have it for about $130 including postage from the UK...

Sunday, May 10, 2009

Custom Surly LHT vs Dawes Ultra Galaxy

While money isn't the biggest issue on my mind when looking at potential touring bikes, it is certainly a major factor. Ideally I think i'd like a Surly LHT frame due to the quality, tyre distance and it's long, sturdy, work-horse frame that is built for hauling lots of gear. I'm not, however, willing to spend rediculous amounts just to get a Surly over another similar touring bike.

Apart from the frame I want decent running gear, probably Deore XT or at least LX with a brooks saddle and quality tyres, racks etc... The stock LHT is not equipped with great running gear (solid, but not great) and does not come with fenders, racks or pedals. It also has bar-end shifters, which I would prefer not to have. Basically, a stock LHT would need some work to get it to the standard I would like. The other option is a LHT frame, built up with custom parts.

I did up a spreadsheet to figure how much it would cost to build up a Surly LHT frame to the same specs as the Dawes Ultra Galaxy. It would cost about $3150, and that was with a fair bit of stuff on special. The Dawes Ultra Galaxy, on the other hand, comes with great running gear, pedals, racks, fenders and nice schwalbe tyres for $2675 + $100 PH.

Quite a saving...plus I would not have to build it! (or more likely pay someone else to build it, which would cost another few hungy!).

I will therefore go for the Dawes Ultra Galaxy..... I have decided! (unless a great Surly LHT comes up for sale second hand)

UPDATE

Okay so I didnt get the Dawes Ultra Galaxy. Why? Well I realised there is such a thing as GST and import duty that must be paid! (thanks Howard). That would add about 15% to the cost, making it around $3k too.... too much IMHO.

After reading the surly google group threads for hours on end, I settled on the idea of the stock surly LHT. While some parts will probably require upgrading, others definitely, upgrades allow you to spread the cost out! Also the LHT can be sourced in Australia, if not Qld, for around $2000.

I discuss my decision a bit more in a more recent post here.

Monday, May 4, 2009

Velo-Orange

Found this awesome bike shop in the US which sells a lot of classic touring stuff. Lots of leather and chrome - which I'm pretty into tbh.

If I do decide to make my own bike, I think I'll be placing a pretty large order to these guys...

Headset


I like this headset too, also from Velo-Orange, which is quite cheap at US$46.

Handlebars


Well these handlebars are awesome!

And they only cost US$55!

Pity you can't get them in Australia... at least not via any shop that turns up results on a google search.

Pannier Bags

Well it would seem that ortlieb are the best easily accessible pannier bags on the market. They cost a bit, but I'm yet to read a bad review of them. Furthermore, it is probably worth splurging a bit on pannier bags because they hold all your stuff and can basically make or break a trip...

Having said that, these ostrich ones look very cool...

Wednesday, April 29, 2009

Dawes Galaxy


Dawes Galaxy
Originally uploaded by angliatv
This also looks incredibly good.... now I'm confused again.